Cloud Resource Plans
Cloud Resource Plans act as templates for Terraform modules. These plans serve as guardrails that let Wayfinder administrators shape the options and configuration for cloud resource components that developers use during the Application self-service process.
As a Wayfinder administrator, you select which workspaces each cloud resource plan should be available in. You can specify more than one workspace for each cloud resource plan. Cloud Resource Plans are visible in workspaces as Resource Types.
View Cloud Resource Plans
View Cloud Resource Plans using the CLI
Wayfinder does not ship with any default cloud resource plans.
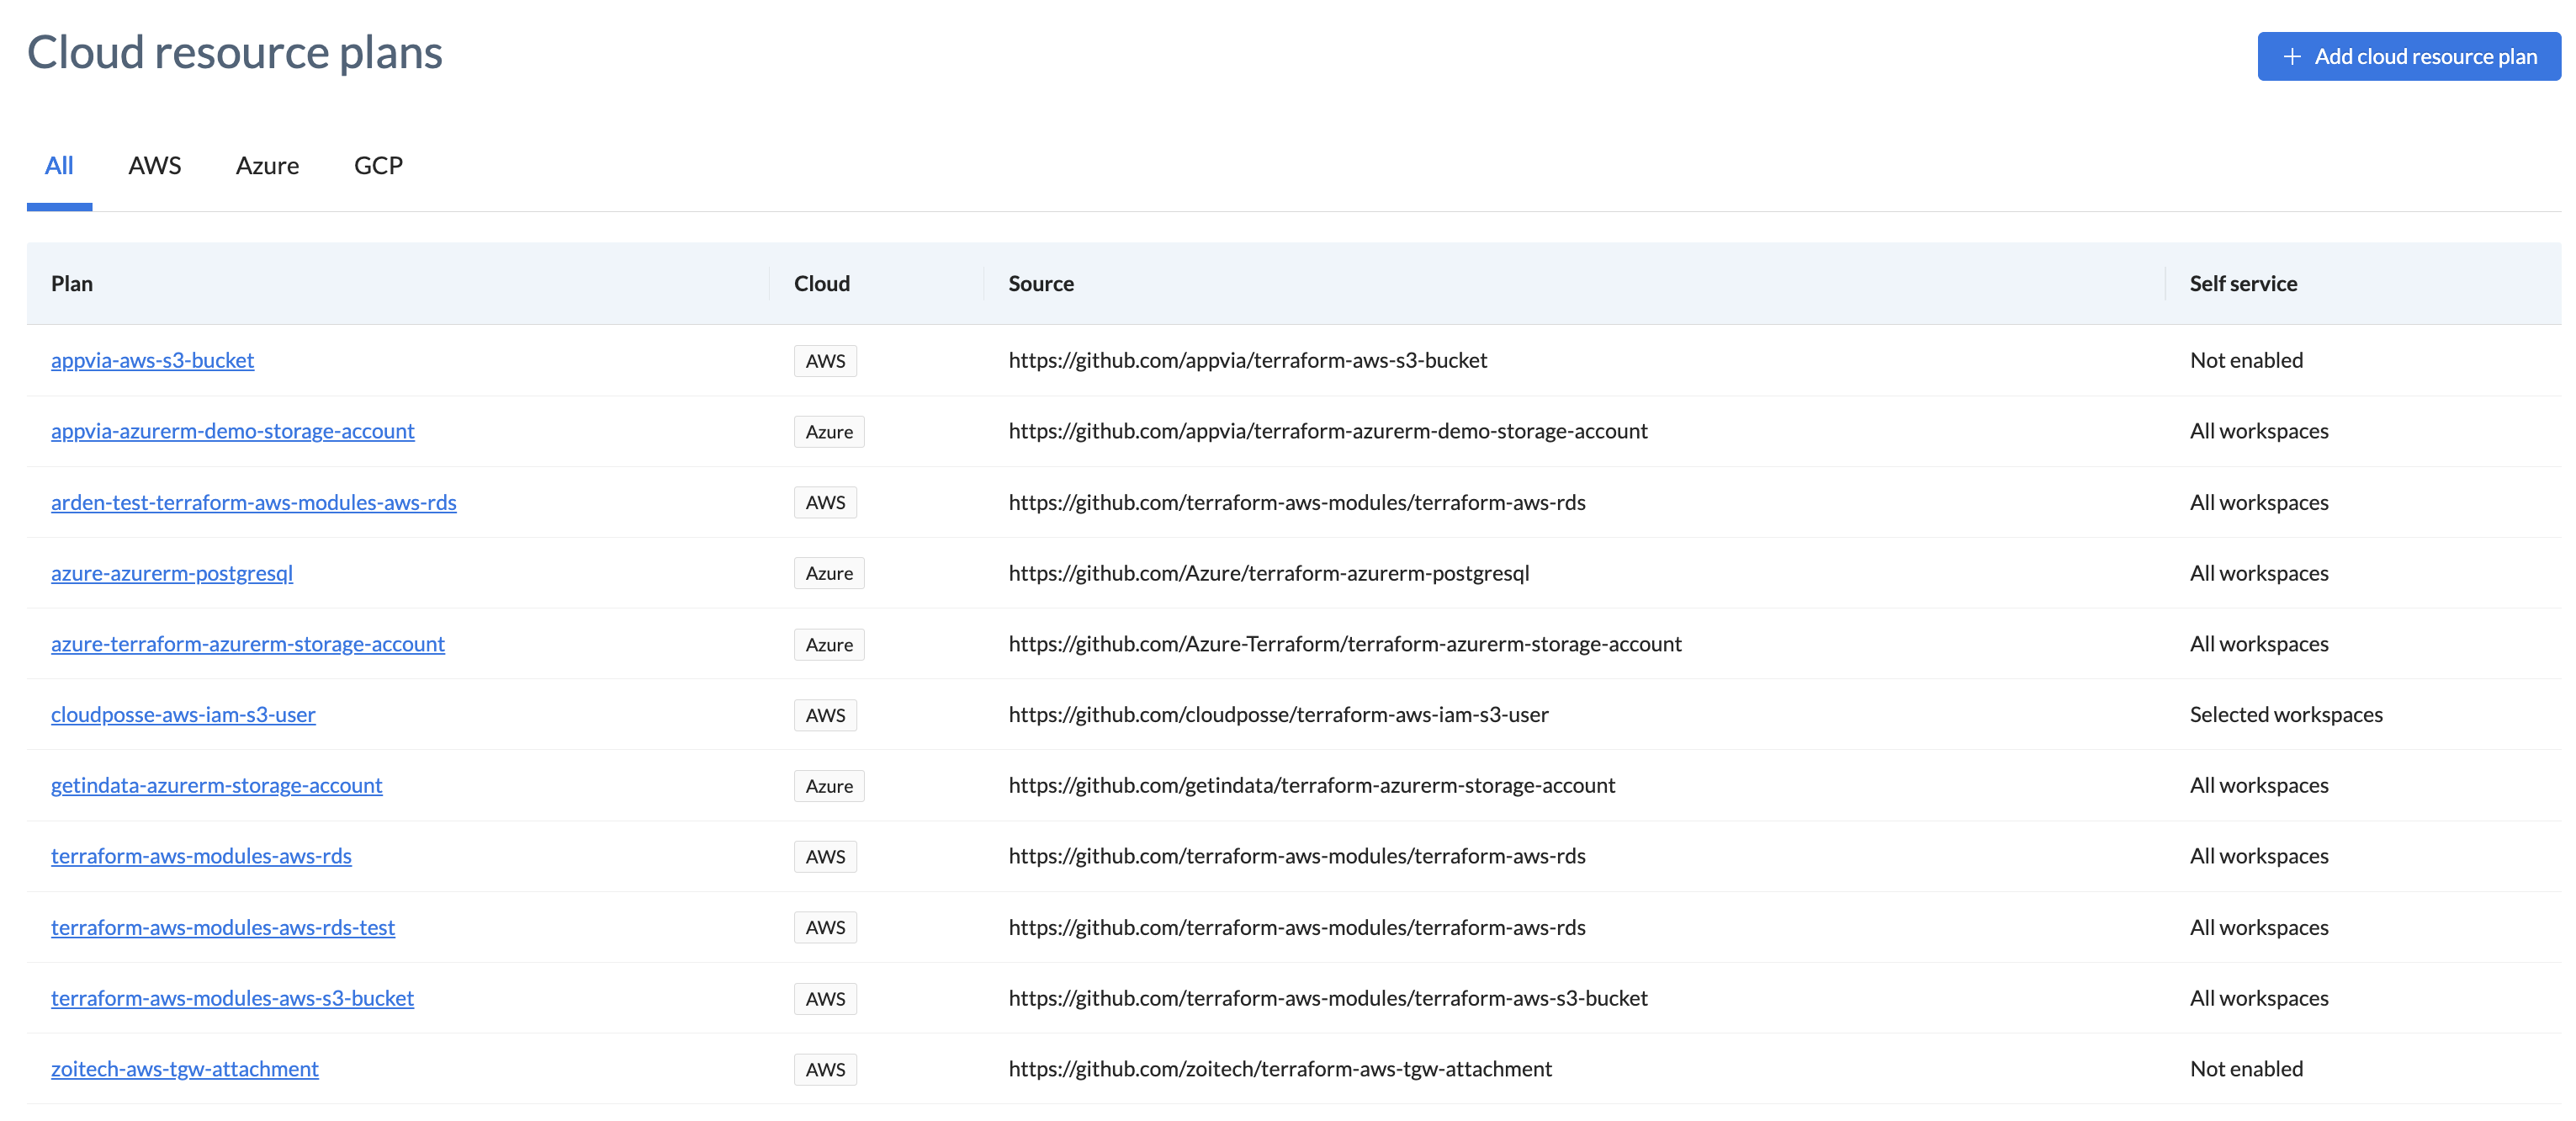
Use wf get cloudresourceplans to view the cloud resource plans that you have already created.
➜  ~ wf get cloudresourceplans
NAME                                       CLOUD    SOURCE                                                                  REVISION    AGE
appvia-azurerm-demo-storage-account        azure    https://github.com/appvia/terraform-azurerm-demo-storage-account        v1.0.0      16d
azure-azurerm-postgresql                   azure    https://github.com/Azure/terraform-azurerm-postgresql                   v1.4        30d
azure-terraform-azurerm-storage-account    azure    https://github.com/Azure-Terraform/terraform-azurerm-storage-account    v0.16.0     17d
getindata-azurerm-storage-account          azure    https://github.com/getindata/terraform-azurerm-storage-account          v1.6.0      17d
terraform-aws-modules-aws-rds              aws      https://github.com/terraform-aws-modules/terraform-aws-rds              v5.5.0      31d
terraform-aws-modules-aws-s3-bucket        aws      https://github.com/terraform-aws-modules/terraform-aws-s3-bucket        v3.8.2      31d
zoitech-aws-s3-with-iam-access             aws      https://github.com/zoitech/terraform-aws-s3-with-iam-access             1.0.0       21d
Use wf get cloudresourceplans NAME-OF-PLAN -o yaml to view the manifest details using stdout.
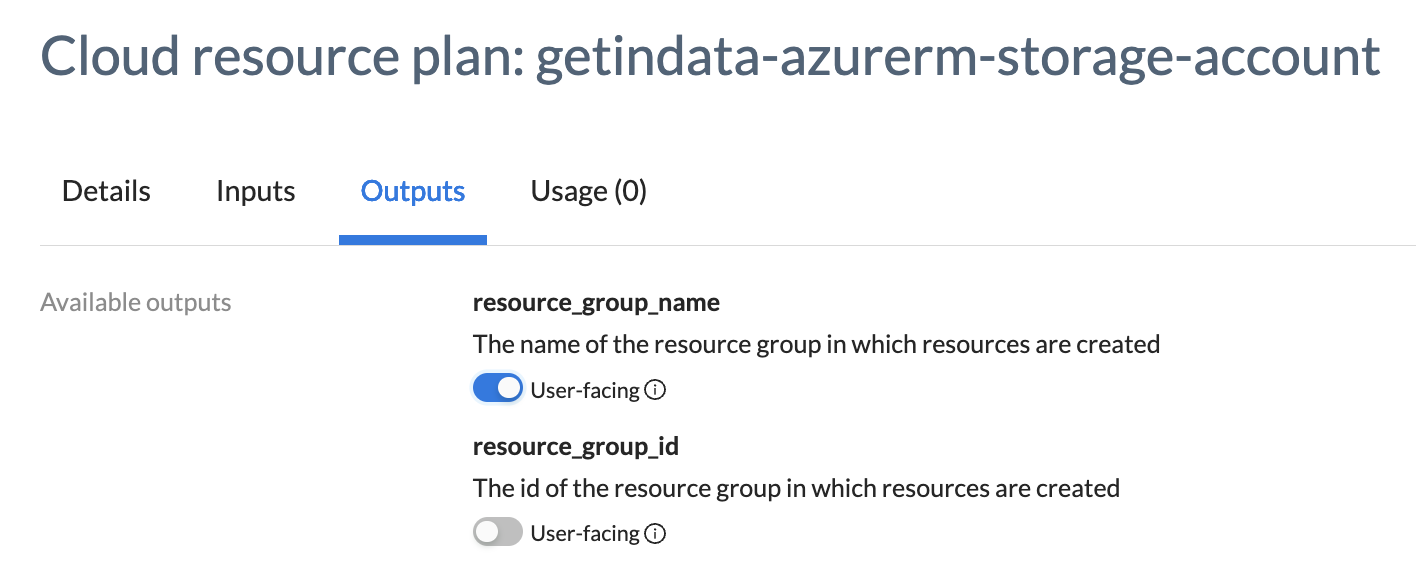
Below is an example of the getindata-azurerm-storage-account cloud resource plan manifest. Also see the screenshots below the example on how the corresponding fields in Wayfinder's web interface map to the manifest's parameters.
wf get cloudresourceplans getindata-azurerm-storage-account -o yaml
apiVersion: cloudresources.appvia.io/v2beta1
kind: CloudResourcePlan
metadata:
 name: getindata-azurerm-storage-account
spec:
 allocation:
   type: all
 cloud: azure
 description: Terraform Module for Azure Storage Account
 enableTemplateAutoUpgrade: false
 enableWatch: false
 inputDefinitions:
 - default: null
   description: A container that holds related resources for an Azure solution
   name: resource_group_name
   required: true                          <-- See 'Required/Optional input' sections
   type: string
 - default: null
   description: List of containers to create and their access levels
   name: containers_list
   type: list(object({ name = string, access_type = string }))
 - default: null
   description: List of storage tables
   name: tables
   type: list(string)

 --- parameters omitted due to size ---

 outputs:
 - description: The name of the resource group in which resources are created
   name: resource_group_name
   userFacing: true                         <-- See 'user-facing' toggle for Outputs
 - description: The id of the resource group in which resources are created
   name: resource_group_id

 --- parameters omitted due to size ---

 policies:                                  <-- See 'allow changes' toggle for Inputs
 - editable: true
   path: containers_list
 - editable: false
   path: resource_group_name

  --- parameters omitted due to size ---

  template:
   revision: v1.6.0
   source: https://github.com/getindata/terraform-azurerm-storage-account
   variables:
     containers_list:                       <-- Values defined by Wayfinder Admin
     - access_type: private
       name: demostoragecontainer
     create_resource_group: false
     location: UK South
     name: demostorageaccount
     resource_group_name: wf-ws-app-aks-abfek-infra-uksouth
➜  ~
Example screenshots that map to the manifest
Please see below screenshots showing Wayfinder's web interface fields that are outlined in the manifest example above.


View Cloud Resource Plans using Wayfinder's web interface
To view cloud resource plans using Wayfinder's web interface:
- Select Admin, then navigate to Cloud > Resources.
- The plans are displayed.

Create a Cloud Resource Plan
Create a Cloud Resource Plan using the CLI
Wayfinder does not ship with any default cloud resource plans. We recommend that you create a cloud resource plan using Wayfinder's web interface to get the manifest's structure, and then to update the manifest as needed.
You can create your cloud resource plans by writing a .yaml file specifying the plan parameters, and then applying it to Wayfinder using the CLI.
To create a new cloud resource plan from an existing one:
- Get the yaml from an existing plan:
wf get cloudresourceplans PLAN-NAME -o yaml > MYPLAN.yaml
This copies the the specified cloud resource plan and places it in a file MYPLAN.yaml.
- Edit the plan file as needed, being sure to change the metadata name to a new name to indicate that you wish to make a new plan. Thereafter, apply the file:
wf apply -f MYPLAN.yaml
Create a Cloud Resource Plan using Wayfinder's web interface
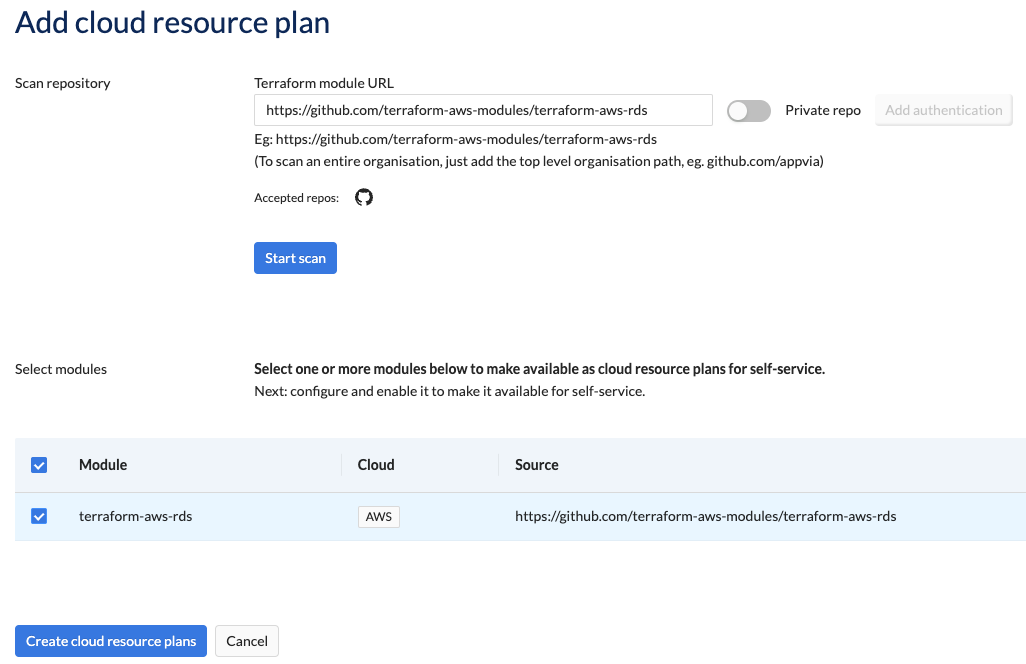
- Select Admin, and then navigate to Cloud > Resources.
- Click on the Add cloud resource plan button. (The Add cloud resource plan screen appears).
- Enter the details as required (See table below for options).
- Click the Scan button. Wayfinder will scan the URL/Repo for available terraform modules. After the scan, select the terraform module that you want to create a cloud resource plan for.

| Field | Description |
|---|---|
| Terraform module URL | Enter the URL of the terraform module to scan. If you specify the top-level organisation, then the entire organisation will be scanned. |
| Private repo | Toggle if you're using a private repo. |
| Add authentication | If you're using a private repo, then give Wayfinder permissions to access it, so that Wayfinder can scan it and return the relevant terrform modules. |
- Click on the cloud resource plan that you have created above.
- By default, plans are set to 'not enabled' when first created. Enable the plan by selecting one or more workspaces.
- Enter the details as required (See table below for options).
| Category | Field | Description |
|---|---|---|
| Details | Source | The URL of the terraform module. |
| Description | You can update the description to something meaningful. | |
| Cloud | If Wayfinder was unable to detect the cloud provider then you can specify it manually. | |
| Enable for self-service | Choose for which workspaces you want this plan to be available in. | |
| Module version | Select the version that you want self-service deployments to use. New versions will be automatically added to this list. Note: Changing this value does not automatically cause provisioned resources to be upgraded. | |
| Inputs | Required inputs | You must provide values for required inputs. |
| Optional inputs | You can optionally provide values for optional inputs. | |
| Allow Changes | Use this toggle if you want developers to override your default values. | |
| Outputs | User-facing | Use this toggle if you want developers to have the ability to map these values to their application's variables. |
Select the Usage tab to see where the cloud resource plan is being used.
Delete Cloud Resource Plans
If you delete a cloud resource plan, future deployments of application components using that plan will fail.
Use wf delete cloudresourceplan PLAN-NAME to delete a cloud resource plan.
➜  ~ wf delete cloudresourceplans zoitech-aws-s3-with-iam-access
◉ Waiting for resource "zoitech-aws-s3-with-iam-access" to delete
✔ Resource "zoitech-aws-s3-with-iam-access" has been deleted
➜  ~
You can delete a cloud resource plan using Wayfinder's web interface as follow:
- Select Admin, and then navigate to Cloud > Resources
- Select the plan that you want to delete.
- Click on the Delete plan button in the bottom right corner.
- This action can't be undone: Click on the Yes delete button to delete the cloud resource plan.