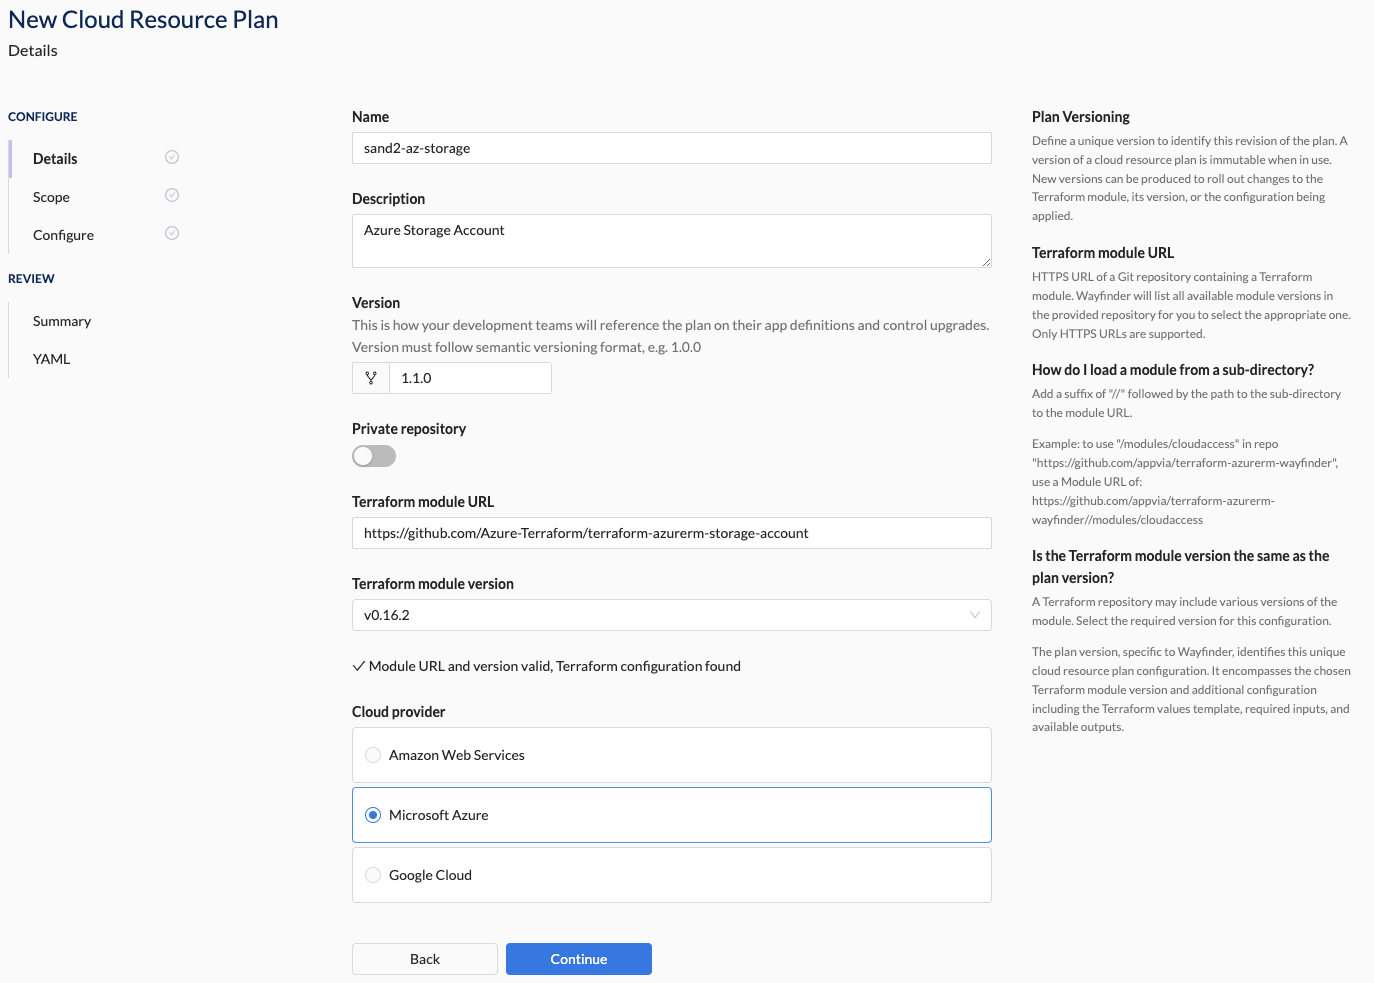
Cloud Resource Plan Details

Overview
-
Identification and Description: Naming and describing your cloud resource plan helps workspace members (developers) quickly identify the appropriate configuration for their application environments (AppEnvs). This clarity reduces confusion and ensures that the right configuration is selected.
-
Versioning: Assign a unique semantic version (e.g., 1.0.0) to each cloud resource plan. This version is specific to Wayfinder and identifies the unique configuration, including the Terraform module version, Terraform values template, required inputs, and available outputs. Note that the cloud resource plan version is different from the Terraform module version, which may include multiple versions.
-
Private Repository and Terraform repository secret: For private Terraform modules, specify a secret that Wayfinder will use to access the private repository. Refer to the Platform Secrets section for guidance on creating a secret for your private Terraform repository.
-
Terraform module URL and version: Provide the HTTPS URL of the Git repository containing the Terraform module. Wayfinder will list all available module versions from the repository for you to select. Only HTTPS URLs are supported. To include a module from a sub-directory, append
//followed by the path to the sub-directory in the module URL. For example, usehttps://github.com/appvia/terraform-azurerm-wayfinder//modules/cloudaccessto reference the/modules/cloudaccesssub-directory in the repository. -
Cloud Provider Configuration: Select the appropriate cloud provider (AWS, Azure, GCP) for the cloud resource you want to add.
Wayfinder allows you to create versioned cloud resource plans using its CLI or Web Interface. For newcomers, starting with the Web Interface is recommended to better understand Wayfinder's concepts and the structure of cloud resource plan YAML files.
📚 For more details on key points, refer to the overview section.
📚 Explore the properties section for additional information on each UI property.
CLI Instructions
CLI Commands - Quick Reference
| Instruction | CLI Command |
|---|---|
| List all cloud resource plans and their versions | wf get cloudresourceplans |
| View versioned cloud resource plan's manifest in console | wf get cloudresourceplans PLANNAME --version SEMVERSION -o yaml |
| Output versioned cloud resource plan's manifest to file | wf get cloudresourceplans PLANNAME --version SEMVERSION -o yaml > MYPLAN.yaml |
| Apply a versioned cloud resource plan's manifest from file | wf apply -f MYPLAN.yaml |
Create a new cloud resource plan
For newcomers, starting with a copy of an existing cloud resource plan can help you understand what the YAML might look like for a specific configuration.
Follow these steps:
- Check which plans already exist using the
wf get cloudresourceplanscommand.
wf get cloudresourceplans

NAME                                        CLOUD    SOURCE                                                                  REVISION    AGE     LATEST VERSION
terraform-aws-modules-aws-rds               aws      https://github.com/terraform-aws-modules/terraform-aws-rds              v5.5.0      533d    0.0.0
zoitech-aws-tgw-attachment                  aws      https://github.com/zoitech/terraform-aws-tgw-attachment                             501d    0.0.0
azure-azurerm-postgresql                    azure    https://github.com/Azure/terraform-azurerm-postgresql                   v1.4        532d    1.4.2
azure-terraform-azurerm-storage-account     azure    https://github.com/Azure-Terraform/terraform-azurerm-storage-account    v0.16.0     518d    0.0.0
- Get the yaml from an existing plan:
wf get cloudresourceplans azure-azurerm-postgresql --version 1.4.2 -o yaml > MYPLAN.yaml
This copies the the azure-azurerm-postgresql cloud resource plan and places it in a file MYPLAN.yaml. Note that the --version flag specifies the version of the cloud resource plan itself, not the Kubernetes version included in the plan.
- Edit the plan file as needed, being sure to change the metadata name to a new name and the cloud resource plan version to a new version, to indicate that you wish to make a new plan. Thereafter, apply the file:
wf apply -f MYPLAN.yaml
Web Interface Instructions
Note that Wayfinder's User Interface has several sections you need to follow in order to create a new cloud resource plan. Below only outlines the Details section.
Steps
- Expand Admin, and then navigate to Cloud > Resource
- Click the +Cloud Resource Plan button
- Fill in the details as outlined in the properties section.
- Click Continue to proceed
Screenshot(s)

Properties
| Field | Description |
|---|---|
| Name | The name of the cloud resource plan (e.g., sand2-az-storage). Assists developers in selecting the correct cloud resource plan when creating an application. |
| Description | A short description describing the purpose of the cloud resource plan (e.g., Azure Storage Account). Assists developers in selecting the correct cloud resource plan when creating an application. |
| Version | The version of the cloud resource plan. Uses semantic versioning (e.g., 1.1.0). |
| Private Repository (toggle) | Indication that the terraform repo is private. |
| Terraform repository secret: | The secret that Wayfinder will use to access the private repository. |
| Terraform module URL | The HTTPS URL of the repository containing the terraform module. Only HTTPS supported. |
| Cloud Provider Configuration: | Specify the cloud provider for which this terraform module is available in. Option(s): - Amazon Web Services (EKS) - Microsoft Azure (AKS) - Google Cloud (GKE) Note: If you don't see the cloud provider you're looking for, then create a Cloud Access with access type "Kubernetes Cluster Provisioning". |