Scenario 1: Control Stage and Workspace Scope
< overview | promote cluster plans


When to use?
Use this scenario when you want to gradually promote the cluster plan to a wider audience. This approach is ideal for rolling out a new cluster network configuration while avoiding unintentional disruptions to existing cluster networks.
Configuration Overview

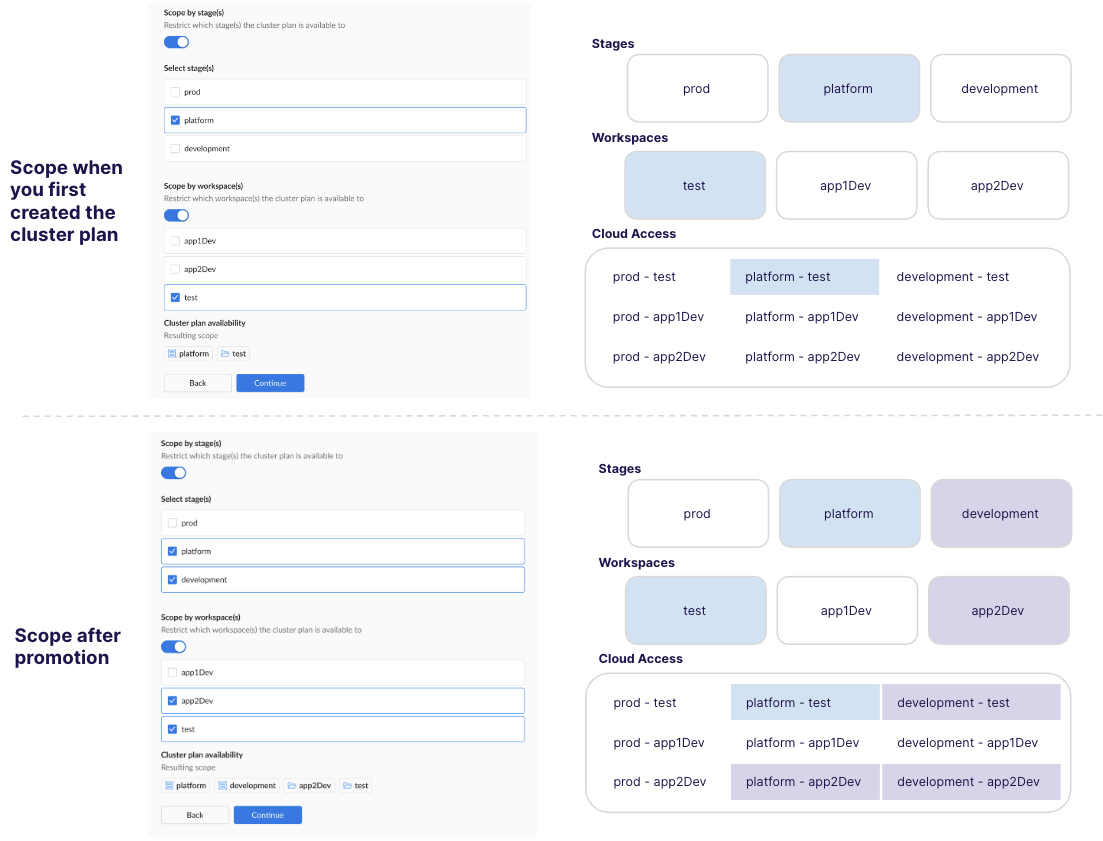
Initial configuration when first created
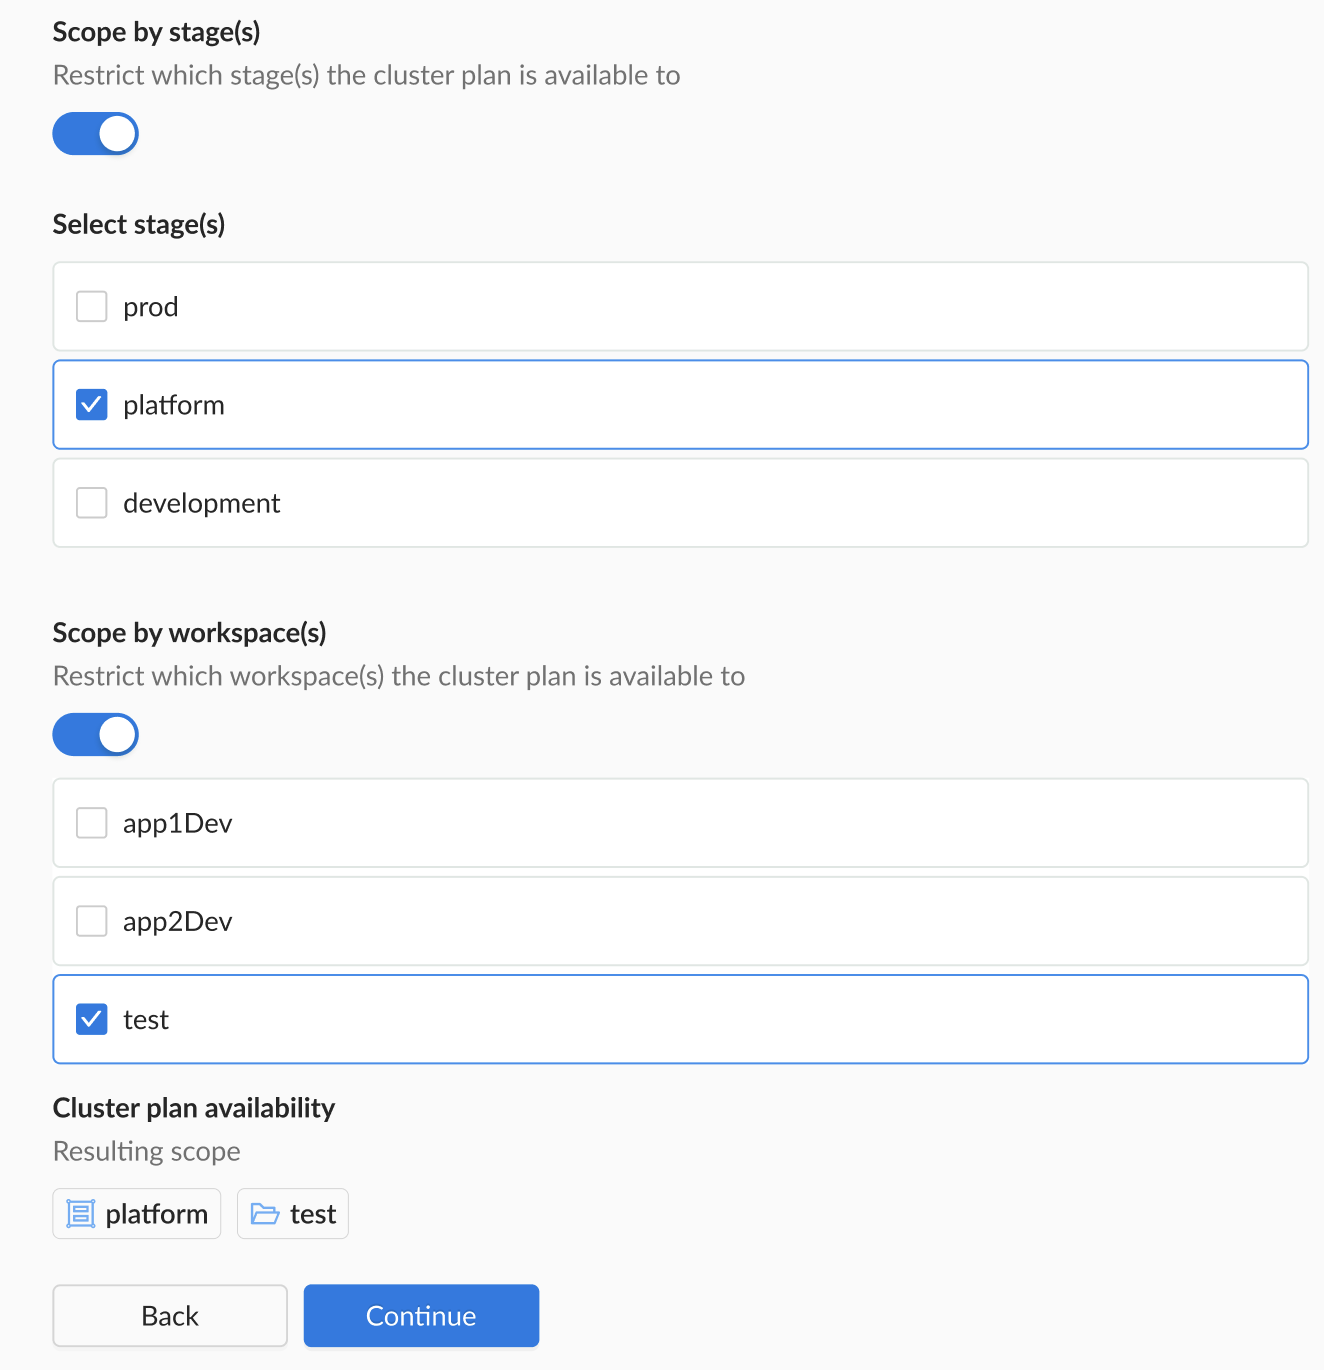
- Stage: platform
- Workspace: test
- Cloud Access: platform-test
- Visibility: The cluster plan is only visible to users in the test workspace. Clusters using this plan can only be created with cloud access referencing the platform stage and test workspace.
Promoted configuration
- Changes made: Kept inital configuration. Added development stage and app2Dev workspace.
- Updated Configuration:
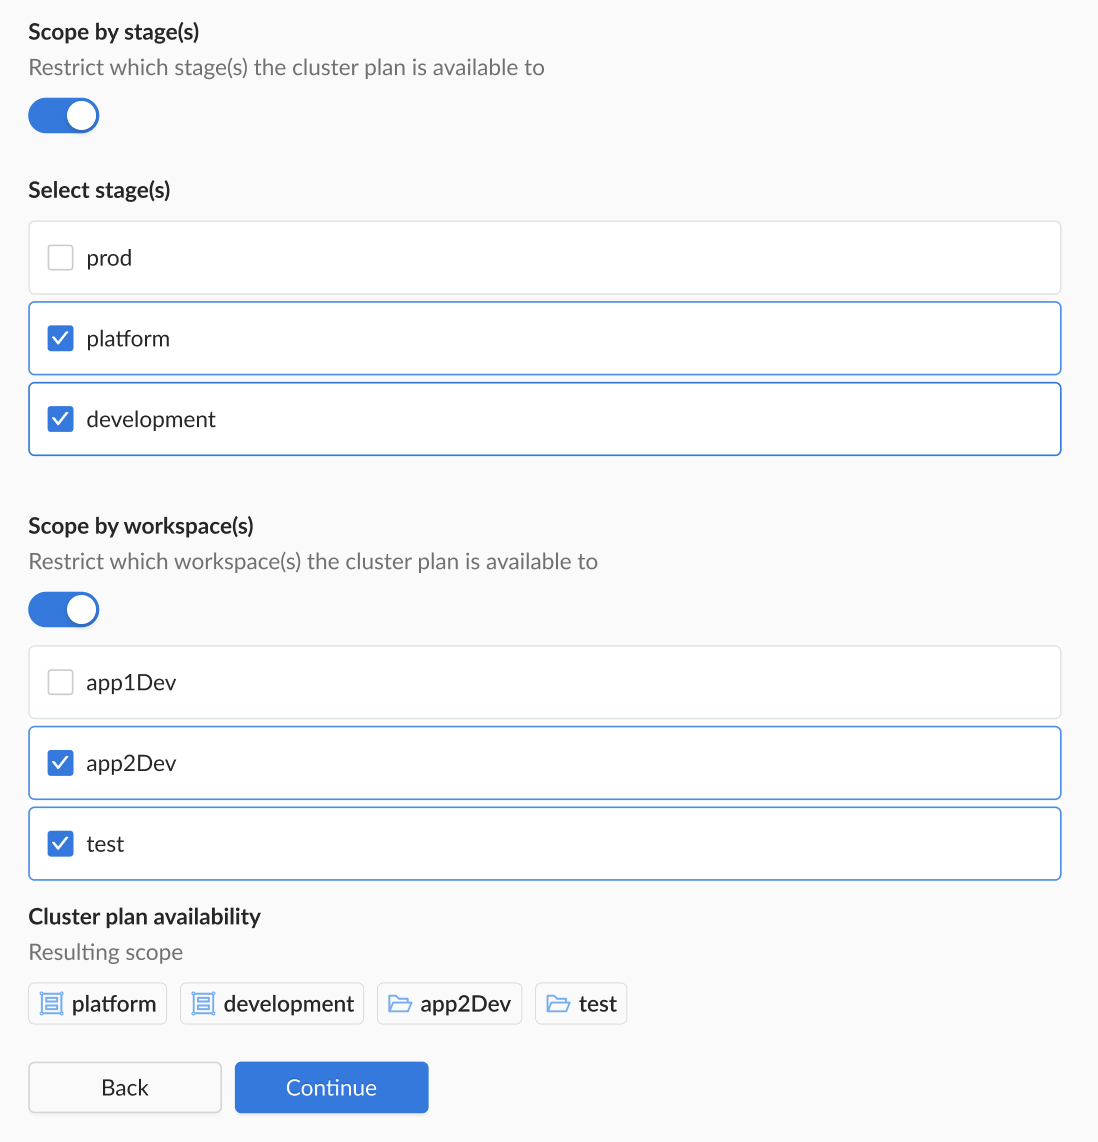
- Stage: platform, development
- Workspace: test, app2Dev
- Cloud Access: platform-test, platform-app2Dev, development-test, development-app2Dev
- Updated Visibility: The cluster plan is now accessible to users in the test and app2Dev workspaces. Clusters can only be created using cloud access that references the platform or development stages and test or app2Dev workspaces.
Outline of steps
- Initial Setup: Create the initial version of your cluster plan scoped to the platform stage and the test workspace.
- Validation: Validate your cluster plan against a test cluster given the cloud access.
- Promotion: Once validated, promote the cluster plan to be available to the development stage and app2Dev workspace. Update the scope to:
- Stages: platform, development
- Workspaces: test, app2Dev
CLI Instructions
- Get the yaml for your existing cluster plan:
wf get clusterplan aks-hardened --version 1.0.0 -o yaml > MYPLAN.yaml
This copies the the aks-hardened cluster plan and places it in a file MYPLAN.yaml.
- Edit the yaml for the stage and workspace as needed. In the following example yaml snippet, we've added "development" to the
allowedStagesproperty and "app2Dev" to theallowedWorkspacesproperty.
scope:
    allStages: false
    allWorkspaces: false
    allowedStages:
    - platform
    - development         <-- Added this
    allowedWorkspaces:
    - test
    - app2Dev             <-- Added this
- Thereafter, save your changes and apply the file:
wf apply -f MYPLAN.yaml
Web Interface Instructions
Note that in this example, we're expanding the initial scope from the platform stage and test workspace to the development stage and app2Dev workspace.
Steps
- Expand Admin, and then navigate to Kubernetes > Cluster Plans
- Click on the Name of your cluster plan.
- Click on the Version of the cluster plan that you want to premote to a wider scope.
- Click the Edit button.
- Navigate to the Scope section:
- Select the stage that you want to include, such as "development"
- Select the workspaces that you want to include, such as "app2Dev"
- Navigate to the Summary and ensure that the scope is as you intended.
- Navigate to the YAML section and either Apply the YAML or use Wayfinder's CLI to apply it, or commit the YAML to your CI pipeline.
Screenshot(s)
- Initial Scope:

- Updated Scope:
