Scenario 2: Control Stage and Workspace Scope
< overview | promote cluster plans


When to use?
Use this scenario when you want a tight scope on workspace visibility, but want to allow all stages. This is useful for testing new node pool limits across multiple cloud access configurations before a broad release.
Configuration Overview

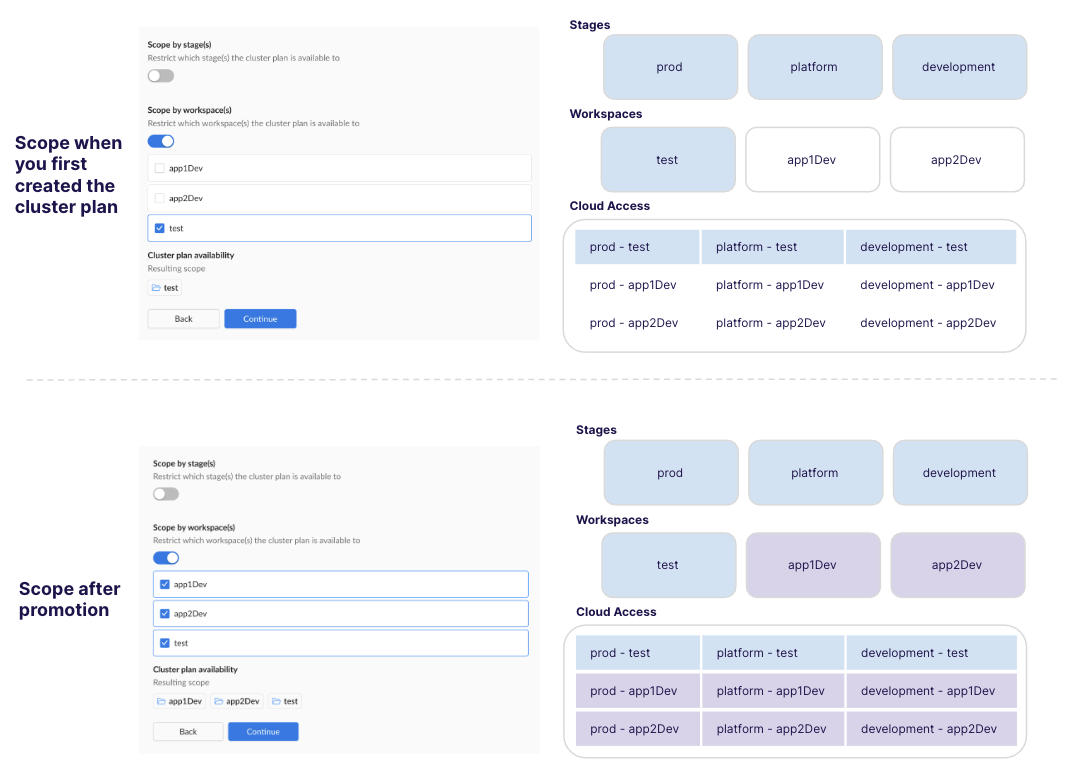
Initial configuration when first created
- Stage: all (toggle should be off)
- Workspace: test
- Cloud Access: prod-test, platform-test, development-test
- Visibility: The cluster plan is only visible to users in the test workspace. Clusters using this plan can be created using a cloud access that references any stage and test workspace.
Promoted configuration
- Changes made: Kept inital configuration. Added app1Dev and app2Dev workspaces.
- Updated Configuration:
- Stages: all (toggle should be off)
- Workspaces: test, app1Dev, app2Dev
- Cloud Access: all 9 cloud access configurations
- Updated Visibility: The cluster plan is now accessible to users in all workspaces and all stages.
Outline of steps
- Initial Setup: Create the initial version of your cluster plan without setting the stage scope (toggle is off), but scope the workspace to test.
- Validation: Validate your cluster plan against a test cluster given the cloud access.
- Promotion: Once validated, update the scope to:
- Stages: all (toggle should be off)
- Workspaces: test, app1Dev, app2Dev
CLI Instructions
- Get the yaml for your existing cluster plan:
wf get clusterplan aks-hardened --version 1.0.0 -o yaml > MYPLAN.yaml
This copies the the aks-hardened cluster plan and places it in a file MYPLAN.yaml.
- Edit the yaml for the stage and workspace as needed. In the following example yaml snippet, we've added "app1Dev" and "app2Dev" to the
allowedWorkspacesproperty.
scope:
    allStages: true
    allWorkspaces: false
    allowedWorkspaces:
    - test
    - app1Dev             <-- Added this
    - app2Dev             <-- Added this
- Thereafter, save your changes and apply the file:
wf apply -f MYPLAN.yaml
Web Interface Instructions
Note that in this example, we're expanding the initial scope from all stages and test workspace to include the app1Dev app2Dev workspaces.
Steps
- Expand Admin, and then navigate to Kubernetes > Cluster Plans
- Click on the Name of your cluster plan.
- Click on the Version of the cluster plan that you want to premote to a wider scope.
- Click the Edit button.
- Navigate to the Scope section:
- Keep the stage toggle off.
- Select the workspaces that you want to include, such as "app1Dev" and "app2Dev"
- Navigate to the Summary and ensure that the scope is as you intended.
- Navigate to the YAML section and either Apply the YAML or use Wayfinder's CLI to apply it, or commit the YAML to your CI pipeline.
Screenshot(s)
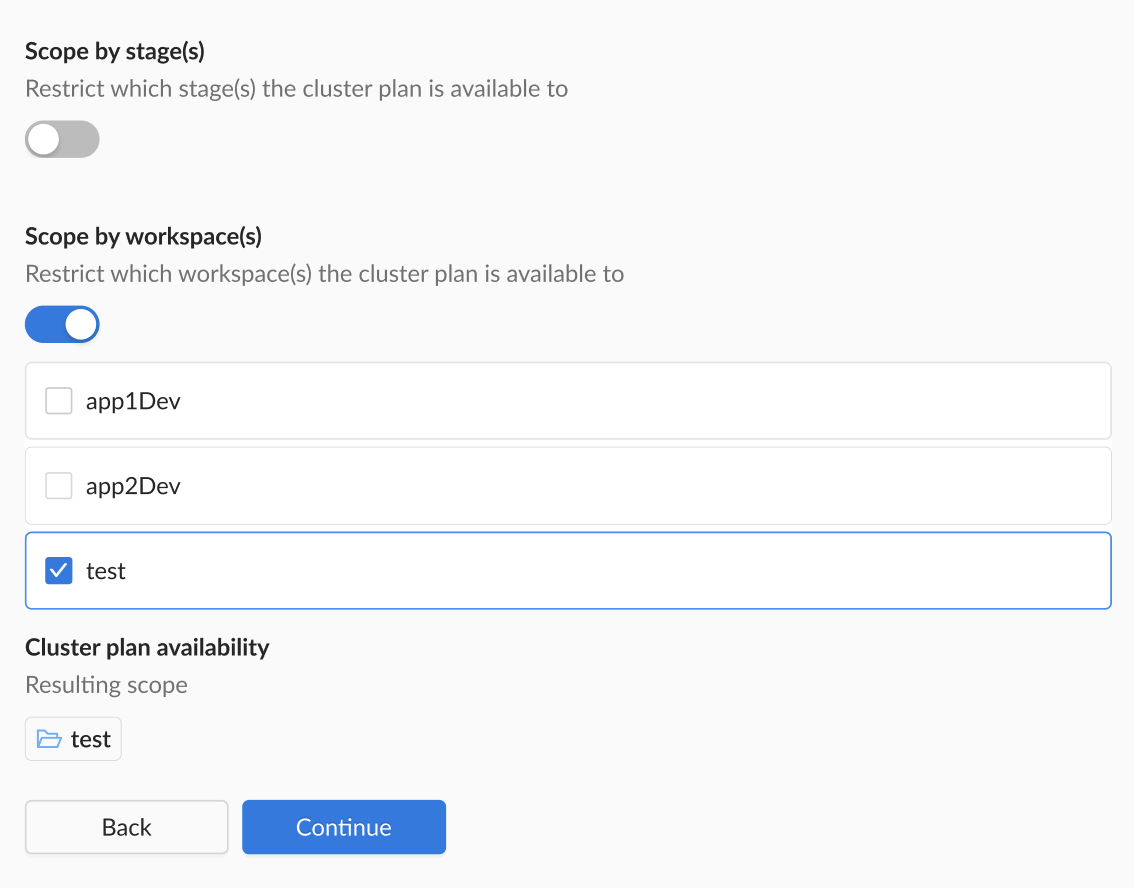
- Initial Scope:

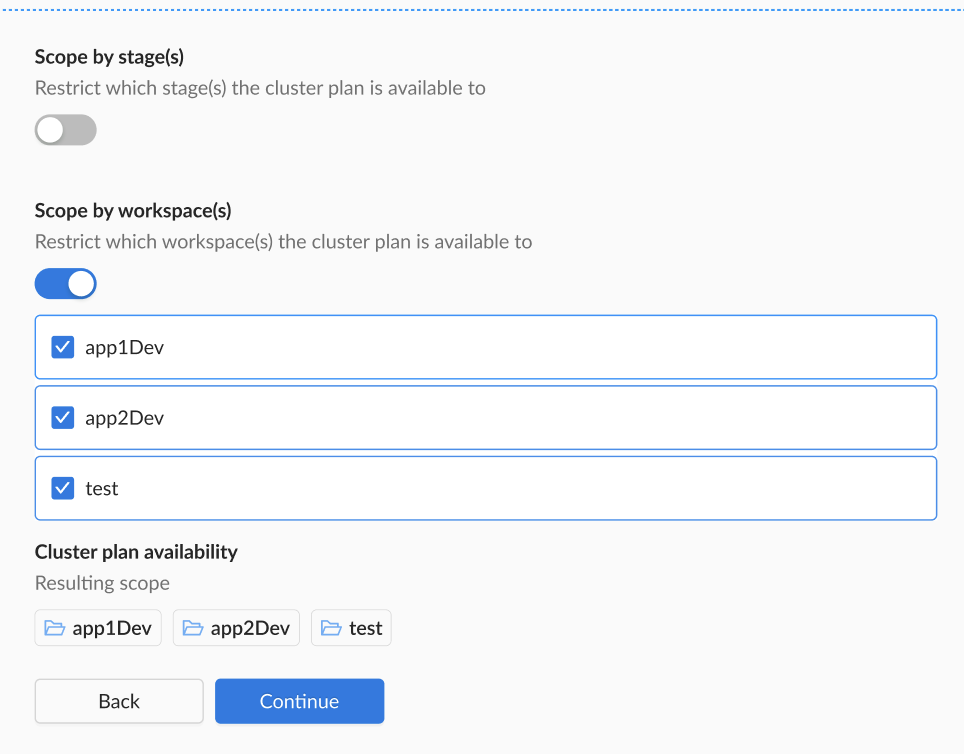
- Updated Scope:
