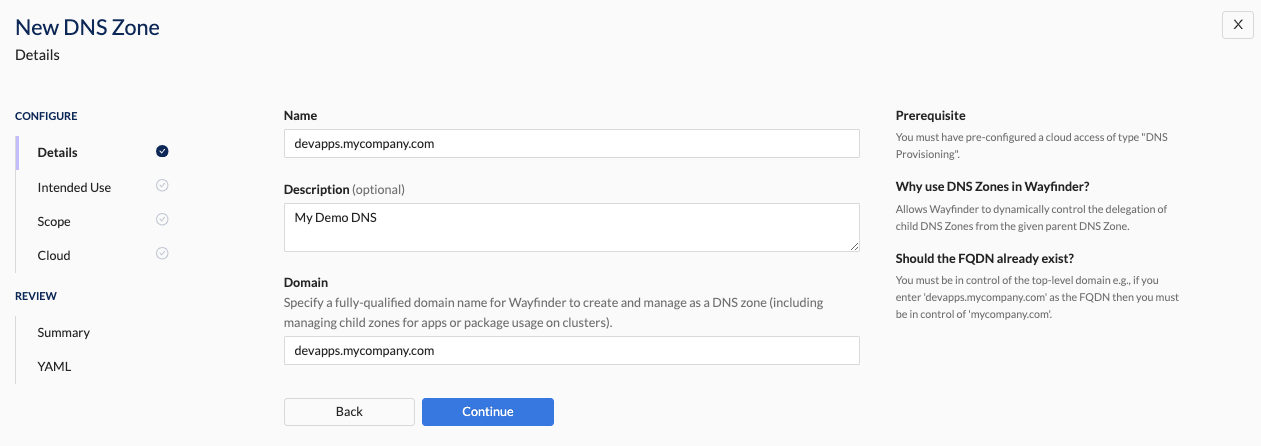
DNS Zone Details

Prerequisite(s)
- You must already be in control of the Top Level Domain (TLD) for example,
mycompany.com. - Configure at least one Cloud Access of type "DNS Provisioning": Wayfinder needs to be given access to the cloud account, subscription or project where you wish your DNS zone to be created.
Overview
- Provide Clear Identification and Description: Use clear and descriptive names for each DNS zone to help your team quickly identify its purpose and configuration.
- Specify the Domain: Enter a fully qualified domain name (FQDN) to allow Wayfinder to automatically create and manage DNS zones. For example: Enter
devapps.mycompany.comwhere your existing TLD ismycompany.com.
Wayfinder allows you to create DNS Zones using its CLI or Web Interface. For newcomers, starting with the Web Interface helps in understanding Wayfinder's concepts and the structure of Wayfinder's DNS YAML files.
📚 For more details on key points, refer to the overview section.
📚 Explore the properties section for additional information on each UI property.
CLI Instructions
CLI Commands - Quick Reference
| Instruction | CLI Command |
|---|---|
| List all DNS Zones | wf get globaldnszone |
| Output a DNS Zones's manifest to file | wf get globaldnszone -o yaml > MYDNSZONE.yaml |
| Apply a DNS Zones's manifest from file | wf apply -f MYDNSZONE.yaml |
Create a new DNS Zone
The easiest way to create a DNS Zone is through Wayfinder's web interface, where you can configure the zone and then copy the generated YAML.
If you already have DNS Zones set up in Wayfinder, you can duplicate an existing configuration and modify the YAML as needed.
Follow these steps:
- Check which DNS Zones already exist using the
wf get globaldnszonescommand.
wf get globaldnszones

NAME                            PROVIDER    DOMAIN                           STATUS
alpha.example.mycompany.com     gcp         alpha.example.mycompany.com      Success
apps-example-mycompany-com      azure       apps.example.mycompany.com       Success
apps.mycompany.private          azure       apps.mycompany.private           Success
- Get the yaml from an existing DNS Zone:
wf get globaldnszones apps-example-mycompany-com -o yaml > MYDNSZONE.yaml
This copies the the apps-example-mycompany-com DNS zone and places it in a file MYDNSZONE.yaml.
- Edit the file as needed, being sure to change the metadata name to a new name, to indicate that you wish to make a new DNS zone. Thereafter, apply the file using the
wf applycommand:
wf apply -f MYDNSZONE.yaml
Web Interface Instructions
Note that Wayfinder's User Interface has several sections you need to follow in order to create a new DNS zone. Below only outlines the Details section.
Steps
- Expand Admin, and then navigate to DNS
- Click the +DNS Zone button
- Fill in the details as outlined in the properties section.
- Click Continue to proceed
Screenshot(s)

Properties
| Field | Description |
|---|---|
| Name | The name of the DNS Zones (e.g., 'devapp.mycompany.com'). Note: While the name can be anything meaningful to you, using the FQDN makes it easier to quickly identify the DNS zone's purpose. |
| Description | A meaningful description for your DNS Zone. |
| Domain | The Fully Qualified Domain Name (FQDN) for example 'devapps.mycompany.com'. You must already have control over the Top Level Domain (TLD) for example 'mycompany.com'. |