Compute Template NodePools
< details | compute templates creation workflow


Overview
You must add at least one node pool configuration to the compute template. Each compute template should be tailored for a specific purpose, such as a cost-effective node pool configuration or a high-performance GPU configuration.
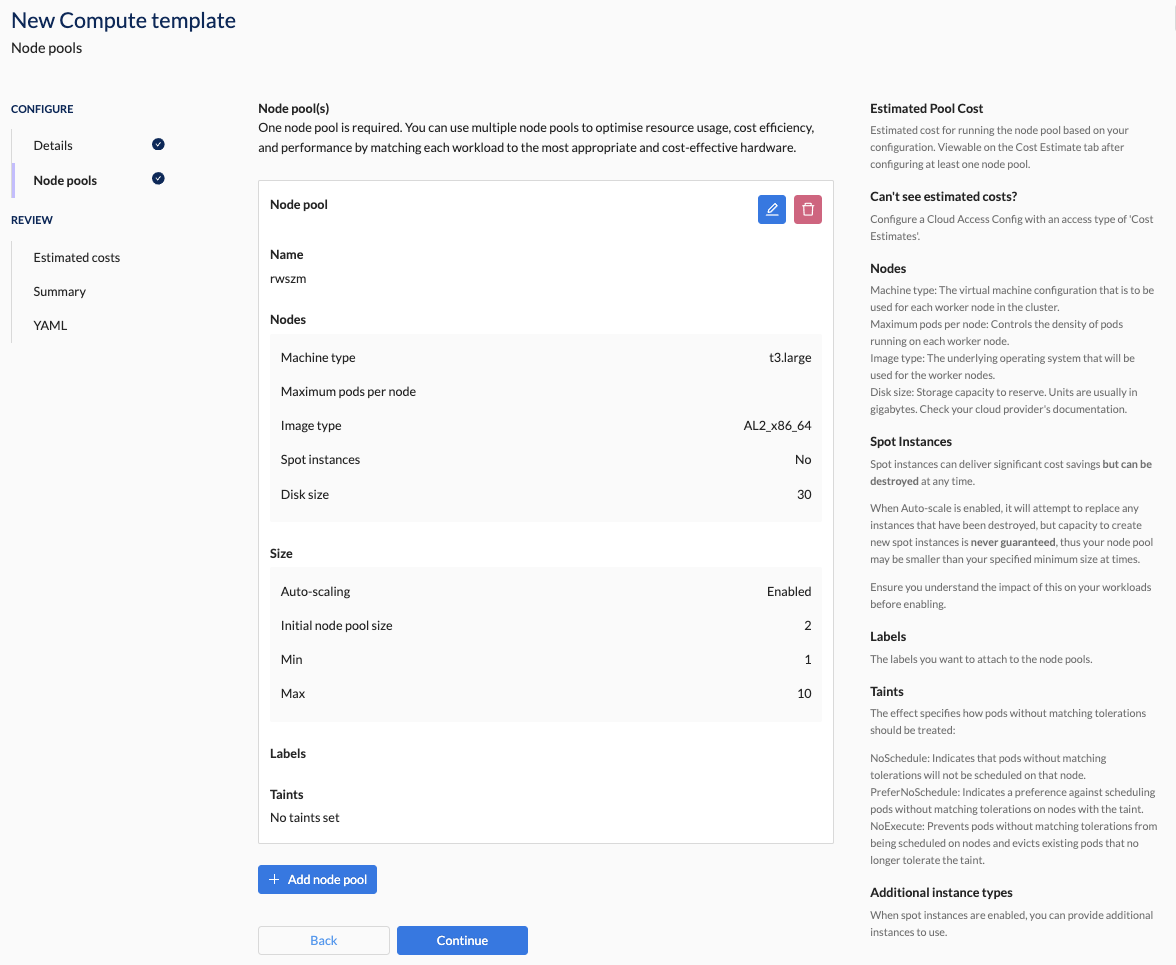
Click the +Add node pool button. You are presented with the following editable node pool configuration options:
- Name: Give this node pool a unique name within the compute template.
- Nodes: Specify properties such as machine type, maximum pods per node, image type (Linux or Windows), spot instance, and disk size.
- Size: Choose the initial node pool size and set parameters when using auto-scaling.
- Mode (Azure only): Indicate if this node pool can host system processes or is dedicated to user workloads - you must have at least one system node pool on Azure clusters.
- Labels: Specify any labels you want to attach to the node pools.
- Taints: Indicate how pods without matching tolerations should be treated.
📚 For more details on key points, refer to the overview section.
📚 Explore the properties section for additional information on each UI property.
CLI Instructions
Follow the instructions in the details section.
Web Interface Instructions
Steps
- Click the +Add node pool button
- Fill in the node pool details as outlined in the properties section.
- Add as many node pools as you need.
- Click Continue to proceed
Screenshot(s)

Properties
| Field | Description |
|---|---|
| Name | Give this node pool a unique name within the compute template. |
| Nodes | Specify the node details for each of the properties below: |
| - Machine type | The virtual hardware configuration that is used for each node in the node pool. The configuration includes memory, the number and type of vCPUs and GPUs along with the IO performance. For more information see: - AWS - Azure - GCP |
| - Maximum pods per node | This places an upper limit on the number of pods that can be scheduled per node in a node pool. This is more relevant for large clusters where networking and other constraints apply. |
| - Image type | The operating system image that will be applied to each node in the node pool. Clusters will require at least one node pool with a Linux image to work. Some applications will only run on Windows. In such cases, create a template with two node pools and set one image as Windows. |
| - Spot instances | Spot instances can deliver significant cost savings but can be destroyed at any time. Spot instances are virtual machines that are using unused capacity in the cloud. If this capacity is required for on-demand instances, any spot instance will be terminated. It is important to enable autoscaling to replace instances when spot instances are terminated. Ensure you understand the impact of this on your workloads before enabling. Option(s): - Disabled (default): Spot instances are not used. - Enabled: Spot instances are used. |
| - Disk size | This disk space attached to a node can be used for downloading container images and for application temporary storage. Note that this does not include persistent storage for applications. |
| Size | Specify the initial node pool size and set parameters for when using auto-scaling as per below: |
| - Auto-scaling | Allow automatic adjustment of the number of running node pool virtual machine instances. Option(s): - Disabled (default): Do not use auto-scaling. - Enabled: Use auto-scaling. |
| - Initial node pool size | The number of worker nodes that are provisioned when the node pool is created. |
| - Min | The minimum number of worker nodes for this node pool. Requires Auto-scaling to be enabled. If using spot instances, the minimum is not guaranteed. |
| - Max | The maximum number of worker nodes that the node pool can scale up to. Requires Auto-scaling to be enabled. |
| Mode (Azure only) | The Azure node pool type. Option(s): - System: Node Pool will be used for running critical Kubernetes components. At least one node pool must be of type "system" and it must use a Linux image. - User: Node pool will not run critical cluster workloads. Will be used in preference for developer applications. |
| Max spot price (Azure only) | When spot instances are enabled, it allows a maximum price to control costs at the expense of availability. Option(s): - Unlimited: There is no maximum. - Limit spot price: The maximum currency amount for the spot price. |
| Labels | The labels you want to attach to the node pools. These can used by workloads to be selective about where they run. Also note that: - There are some automatic labels applied by the cloud provider and by Kubernetes. - You can add additional labels. |
| Taints | Taints can prevent pods from automatic scheduling on nodes in a nodepool. See Kubernetes documentation for more information. The "key" and "value" define the characteristic that the taint represents. The "effect" specifies how pods without matching tolerations should be treated. The "effect" can be one of three options: - NoSchedule: Indicates that no new pods will be scheduled on that node. - PreferNoSchedule: Indicates a preference against scheduling pods without matching tolerations on nodes with the taint. - NoExecute: Prevents pods without matching tolerations from being scheduled on nodes and evicts existing pods that do not include the correct tolleration when the taint is added. |